Stop treating your bio link as a glorified table of contents. If your primary call-to-action is just a list of blue text buttons, you are losing high-intent traffic the second they hit your page. The most effective social-to-lead workflows treat the bio page as a destination, not a departure lounge.
We get it. Your team manages dozens of social handles across multiple brands. Maintaining perfect synchronization between a campaign, a landing page, and a social post is messy work, often resulting in broken journeys and disconnected tracking. It is a classic case of coordination debt-where the speed of your social team outpaces the ability of your web team to build individual landing pages for every minor update.
This article will help you audit your current strategy and transform it into a high-performance lead capture surface using your existing Mydrop infrastructure.
The decision teams usually frame too broadly

Most teams fall into the "Link List" fallacy. They assume that because they have fifteen active campaign initiatives, they need fifteen corresponding link buttons. They treat the bio page as a directory of where we have been instead of a focused funnel for where the customer should go next.
This happens because we over-index on "links" and ignore "conversions." We treat the page as a neutral utility, fearing that if we highlight one offer too aggressively, we will miss out on traffic meant for another. In reality, you are just diluting your signal until every button competes for attention and none of them get the click.
The reality is that your audience is rarely looking for a menu. They are looking for the next step in the journey you promised them in your last post. When you provide a list of ten options, you are asking them to make a choice. When you provide one high-conversion block-like a gated download or an email capture form-you are asking them to take a step.
Operator rule: A conversion-optimized bio page should lead with a singular, high-value action, not a navigation menu. If the visitor has to scroll past three "Read our latest blog" links to find the "Request a Demo" form, your UI is fighting your objective.
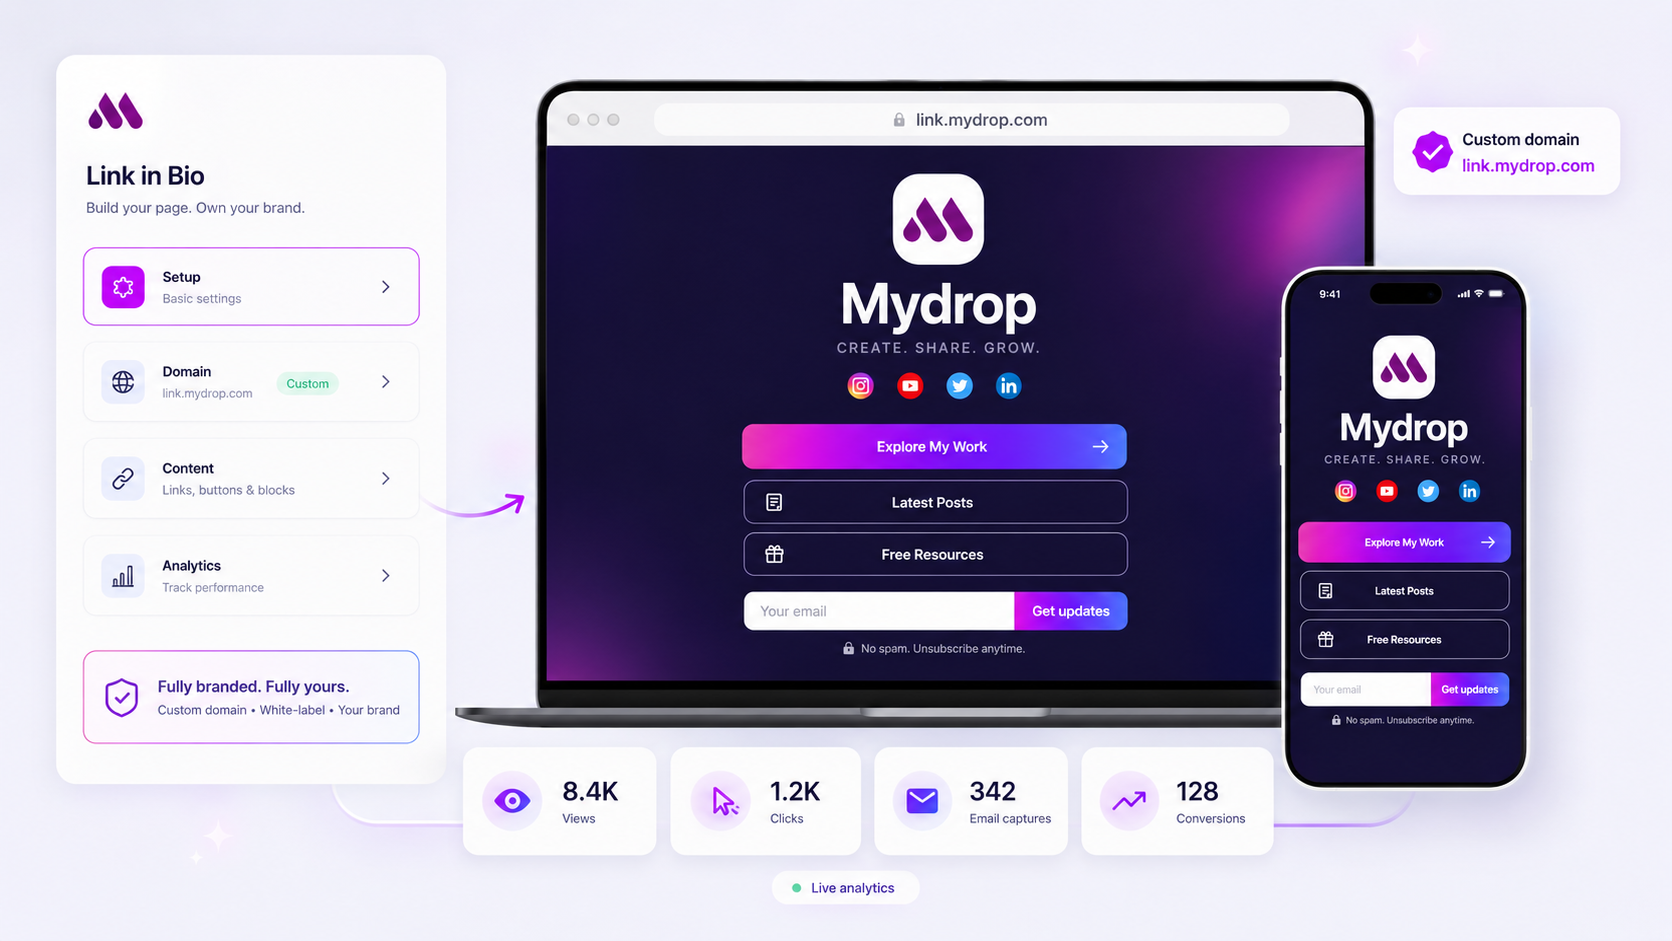
This isn't just about design; it is about visibility. At Mydrop, we see teams struggle when they try to force a full website's worth of navigation into a mobile-first, micro-site format. When you switch your mindset to treating the page as a lightweight landing page, the clutter disappears. You start asking, "Does this block drive an interaction?" instead of "Do we have a link for this?"
If the answer is no, the link does not belong above the fold. Prioritize the path that actually moves your team's needle.
What should stay manual and what can move faster
The biggest efficiency killer in enterprise social is the constant, manual re-capping of the same assets across every brand property. If your team is still spending Friday afternoons manually updating links on ten different bio pages because a campaign asset moved or a blog post was pushed, you are burning capital on administrative busywork.
You should automate the flow of secondary content. Things like your latest blog entries, recent public social posts, or evergreen media kits should sync dynamically to your bio page via an automated feed block. There is zero reason to manually swap those links every time you hit publish on your primary CMS.
Conversely, keep high-stakes conversion blocks manual. Anything tied to a live launch, a time-bound promotion, or a high-value lead capture form requires a human eye. You want a designated team member to verify the call-to-action alignment, test the email capture flow, and ensure the UTM parameters are correctly mapped to your CRM. If you automate the copy-paste of a link, you might save five minutes, but you risk sending high-intent traffic to a broken path or a generic homepage that has no idea where the visitor came from.
Decision check: If a visitor needs to know the context of the specific campaign they clicked on to convert, that block must be curated and verified manually by the campaign lead.
The tradeoff matrix
Every decision to turn a link into a landing page involves balancing pure reach against conversion friction. When we look at how successful teams manage this, they are constantly weighing whether to prioritize "speed to surface" or "depth of engagement."
The following matrix helps your team decide which blocks earn a spot on your bio page based on the campaign intent.
| Asset Type | Goal | Automation Level | Conversion Friction |
|---|---|---|---|
| Social Feed Block | Social Proof | High (Auto-sync) | Low |
| Media Kit / Download | Asset Distribution | Medium (Static link) | Low |
| Campaign Lead Form | Email Capture | Low (Manual/Curated) | High |
| Brand Link List | Site Traffic | High (Evergreen) | Low |
If you are just surfacing "more stuff," go for high automation. Your visitors are there to browse, and the overhead of maintaining that list should be near zero. However, if your team is running a 48-hour sprint for a new product launch, move those conversion elements out of the automated feed and into a curated, high-intent landing block.
Most teams get stuck because they try to make one template do both jobs. A better approach is to treat your bio page as a hybrid. Keep the bottom two-thirds of the page as an automated "evergreen" zone that updates itself, but reserve the top "hero" position for the manually curated, high-priority conversion block of the week. This keeps the page fresh without adding to your team's coordination debt.
When you support dozens of brands, this structure saves your team from the endless cycle of "who updated the links?" by ensuring that 80% of the page maintains itself, leaving them to focus their energy on the 20% that actually drives revenue.
How to pilot the workflow safely
You do not need to overhaul every brand profile at once. The most resilient teams start by isolating a single, lower-stakes channel to test the conversion logic before rolling it out to flagship accounts. Pick one secondary brand or a product line with consistent, moderate traffic and treat it as your "conversion sandbox."
When you shift from a standard link list to a branded landing page, start with these four steps to ensure your tracking and user experience remain intact:
- Baseline the current state: Note the average click-through rate on your existing link list for one week.
- Design the test page: Build a Mydrop link-in-bio page for your sandbox brand, replacing the traditional list with one primary lead-capture block and a secondary CTA button.
- Align the traffic: Update your social post templates for that brand to drive traffic directly to the new
mydrop.bioslug rather than your generic site homepage. - Compare conversion paths: Measure the delta between your previous link-click volume and the new lead-capture signups.
Workflow check: Never swap your primary bio link during a high-traffic campaign launch. Pilot the change when volume is steady so you can isolate the impact of the page layout from the impact of the content itself.
If the sandbox page outperforms the old link list by even a small margin, you have the proof you need to scale. This approach saves you from explaining a sudden, global traffic dip to stakeholders while you are still fine-tuning your page structure.
The operating rule to keep
Your bio page is not a temporary storage bin for links; it is a permanent piece of your digital infrastructure. Once you adopt the landing-page mindset, you must treat the page with the same rigor you apply to your main website. This means establishing a governance habit: update your bio page assets, such as featured media kits or active campaign blocks, at the same cadence as your social content calendar.
The most common trap is the "set it and forget it" mentality. A link page that hosts a contest from three months ago is not just a missed opportunity; it signals to your audience that your brand is disorganized. Use your Mydrop publishing controls to schedule updates for your bio page blocks alongside your scheduled posts. When the post goes live, the link-in-bio update goes live. Consistency here builds trust, and trust is the invisible engine behind every conversion.
Conclusion
Stop letting your bio link act as a passive directory. By shifting your strategy toward a conversion-first model, you reclaim high-intent traffic that is already sitting at the top of your funnel. It is time to treat your Link in Bio as the powerful, branded landing page it was designed to be. Take your sandbox, test a dedicated capture block, and start measuring outcomes instead of just clicks. Your audience is already there; you just need to give them a reason to stop scrolling and start converting.